The ultimate guide to deploying your node app on Linux
This time we do the work for you.
January 24, 2020
This time we do the work for you.

This is the latest version of the most popular guide to deploying node on Linux on the internet, which has been kept updated with input from the community.
It sets up:
apt-get.This guide focuses on:
Using modern npm (v7+) with built-in workspaces support and improved lockfile handling. Both npm and yarn are excellent choices in 2026.
Ubuntu LTS as the target distribution - focusing on a single, popular distro keeps the guide clear and maintainable.
Links to different strategies for load balancing at the end of the article.
Oh yeah and one more thing:
While the guide still covers the 'why' and 'how' of deploying node - you can automate all the above using Cloud Init. The approach is:
...and you'll have a custom cloud-init.yaml file for AWS, Azure, Digital Ocean and most other cloud providers.
Specify the Cloud Init as 'User Data' when you're building a box (either manually or via the API):
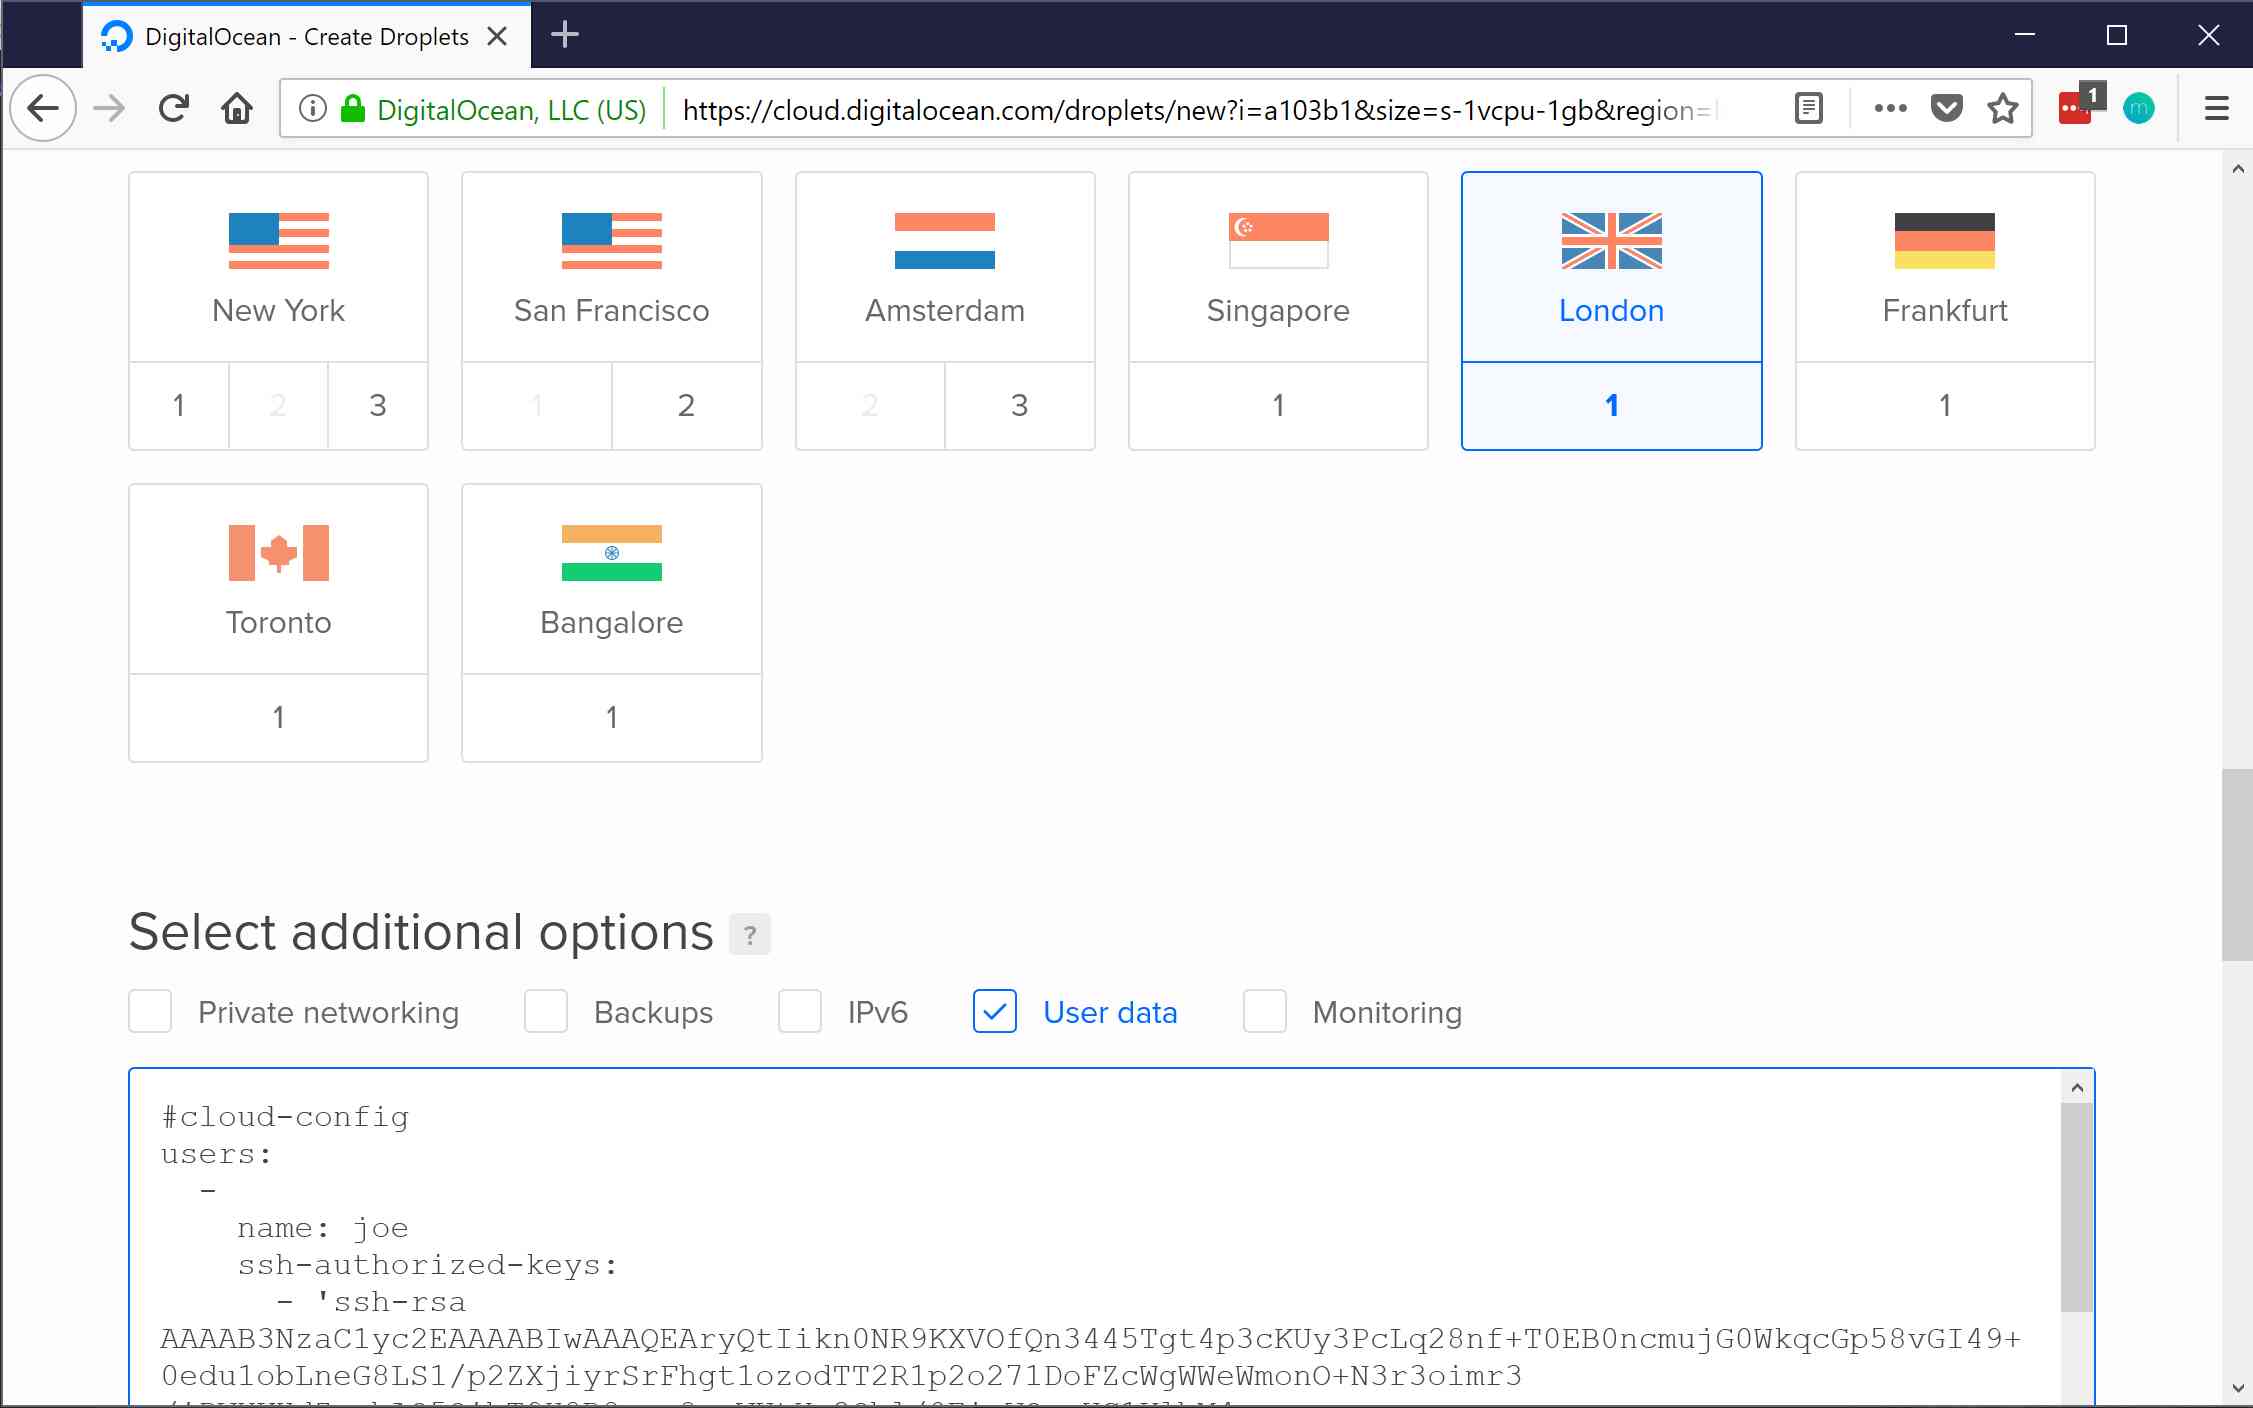
The build takes around 30 seconds on a Digital Ocean droplet. Once it's complete, skip straight to deploying.
Set up user accounts and SSH keys
Install node, yarn and build tools
Add a shrinkwrap file, for consistent deploys
Setup HTTPS and load balancing
# Debian / Ubuntu
apt-get update
apt-get -y dist-upgrade
Your cloud provider might already set up a user account and public key access — for example, AWS create ec2-user with sudo access and your public keys already authorised to log in to this account. If that's the case, skip ahead.
However some cloud providers (like Digital Ocean) just give you a root user. Logging in as root all the time is considered somewhat insecure — for one thing, everyone already knows the user name, so let's make a regular user account:
# Debian / Ubuntu
useradd -m -G admin -s /bin/bash mike
Enable passwordless sudo access to people in the 'admin' group — this means you won't have to retype your password to run sudo. Editing the sudoers file is a bit special: if you mess it up, you could lock yourself out. So run:
visudo
…which just opens your editor on the sudo file, and checks the syntax before you save. Uncomment the line that looks like:
# Debian / Ubuntu
%admin ALL = (ALL) NOPASSWD: ALL
Now try logging in as a regular user from the outside world. You should be able to log in using your public key (ie, without needing a password) and be able to run
sudo -l
to list your access. Does it say something like:
User max may run the following commands on somebox:
  (ALL) NOPASSWD: ALL
? Good. You now have a working admin account. You can run
sudo someCommand
To run a single command or:
sudo -i
To run an interactive shell.
If you're using GitHub: you can find a copy of your user's public keys at https://github.com/(their GitHub user name).keys
Otherwise, ask each member of your team for a copy of their public key. If they're not sure, check the ~/.ssh/id_rsa.pub file on their computer, and if the file doesn't exist, run ssh-keygen to make a new one.
Make sure people only give you the .pub keys, otherwise they'll have to regenerate everything.
Got the users keys? Copy them, one key per line, into ~/.ssh/authorized_keys on the box (note the American English spelling). Doing this allows whoever has the corresponding private key to log in as that user.
Check you can log in using ssh without needing a pasword.
Let's disable root logins over SSH then.
Edit /etc/ssh/sshd_config, find the PermitRootLogin line and change it to no. Then run:
systemctl reload sshd
To make the changes apply.
There's a whole bunch of reasons why you might want to set the time on your server to UTC. First let's update the timezone:
rm /etc/localtime
ln -s /usr/share/zoneinfo/UTC /etc/localtime
To check your work, look at the local time right now:
date
The answer should be the same as the UTC date:
date -u
Install Node 20 (LTS) or Node 22 (current LTS), and development tools. The latter are needed to compile binary modules — e.g., npm install node-sass would need the development tools to build libsass.
The lovely people at NodeSource make official packages of node for most distros.
# Add nodejs repo
curl -sL https://deb.nodesource.com/setup_20.x | sudo -E bash -
# install node and development tools
sudo apt-get update
sudo apt-get install -y nodejs build-essential
npm's package-lock.json ensures that your dependencies - specifically your dependencies' dependencies - remain the same. So the package versions you use on your developer machine are the same as what ends up on the server. package-lock.json is automatically updated when you install or update dependencies, so just commit the package-lock.json file.
git add package-lock.json
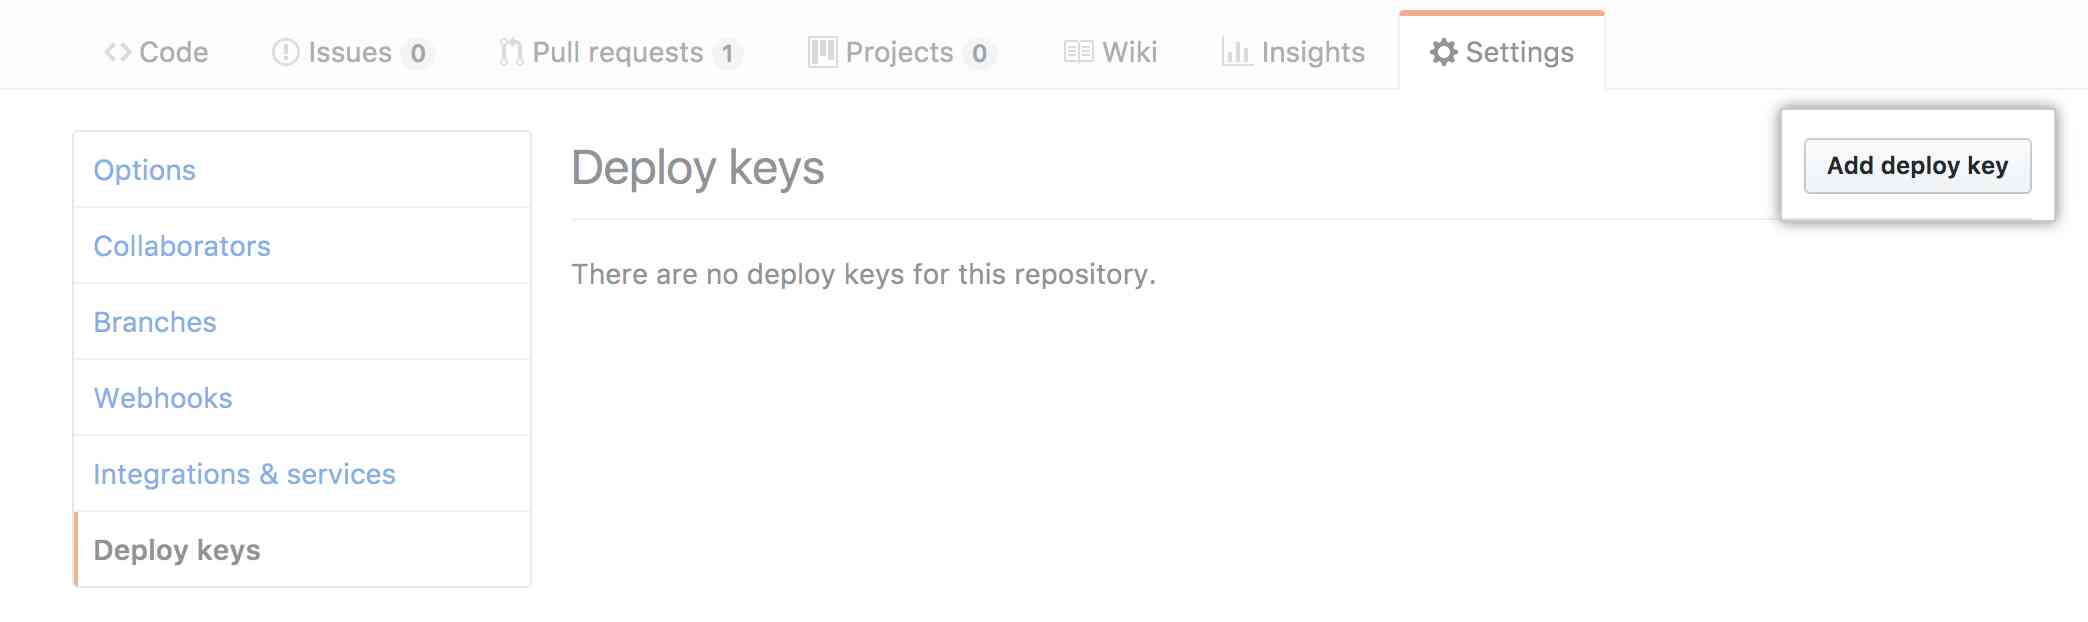
We're going to update our apps using git. If you use GitHub or GitLab, rather than using a particular person's SSH key for git, you can create a special 'deploy key' which only has read access to a single project. You'd normally make the key on the machine:
ssh-keygen -t rsa -C myapp@mycompany.com
You should really be using HTTPS these days.
Since you'll probably have at least two app servers, you're best to terminate your HTTPS on a load balancer: this means a single place for your HTTPS to be handled before it's passed on via straight HTTP to one of your running node servers.
In AWS, set up an AWS Application Load Balancer (ALB, also called ELB version 2). These are an AWS-specific load balancing application, and that's where you'd install your HTTPS certificate and key.
In Digital Ocean, set up Digital Ocean's load balancer. Install your HTTPS certificate and key, point it at your app servers and go. Note DO Load Balancers only suport the older, slower HTTP1.1, so you might prefer HAProxy.
Otherwise, use HAProxy. It's a high availability proxy, that will sit in front of your appservers, handle HTTPS, and direct customers to the current active server. Our guide sets up a load balancer with HTTP/2 and dynamic reconfig.
You might also be interested in nginx, but the Open Source version lacks features compared to HAProxy.
Once you've set your load balancer, check your work at SSL Labs - you should get at least an A.
Services on all popular Linux distributions now use systemd. This means we don't have to write shell scripts, explore the wonders of daemonization, understand how to change user accounts, make sure we clear environment variables, set up automatic restarts, log to weird syslog locations like 'local3', and other necessary, yet overly complex work.
Instead, we just make a .service file for the app and let the OS take care of these things. Here's an example one, called myapp.service:
[Unit]
Description=Your app
After=network.target
[Service]
ExecStart=/var/www/myapp/app.js
Restart=always
User=nobody
# Use 'nogroup' group for Ubuntu/Debian
# use 'nobody' group for Fedora
Group=nogroup
Environment=PATH=/usr/bin:/usr/local/bin
Environment=NODE_ENV=production
WorkingDirectory=/var/www/myapp
[Install]
WantedBy=multi-user.target
Here are the more interesting lines:
After means we'll start this service after the network service has started.
ExecStart is the app to run. It should have an interpreter on the first line of the file — eg, you'll want to add #!/usr/bin/env node to app.js if it's not already there. You'll also want the file to be executable: chmod +x app.js
Environment lines are the environment variables — setting NODE_ENV to production is a node standard to tell apps like Express and gulp to run on your production settings.
Copy your service file into the /etc/systemd/system directory. Then make systemd aware of the new service:
sudo systemctl daemon-reload
Make the service start on boot:
sudo systemctl enable application
After this you can SSH into the box and:
~/.ssh/id_dsa.pub to your project on GitHub / GitLab as a deploy key. You can now cd to /var/www and run git clone and your project will pull down.npm install to pull down dependencies and npm run build to run build taskssudo systemctl start (app name).All your node console output is logged to the journal with the same name as your .service file. To watch logs for 'myapp' in realtime:
sudo journalctl --follow -u myapp
Unless you're perfect the first time you run your app you might have the odd problem — you forgot to run gulp, file permissions are incorrect, etc. Read the log output using journalctl, fix anything it tells you about, then restart the app with:
sudo systemctl restart myapp
Your app should soon be up and running.
Deploying should be a matter of cleaning any generated files, pulling the latest code, installing whatever new packages your node-shrinkwrap file specifies, and restarting the service:
git clean -f -d
git pull origin/master
npm install
npm run build
sudo systemctl restart myapp
So recapping everything everything we've done:
.service file.I hope that was useful — if you have additions or corrections feel free to let us know in the corresponding Hackers News post.
If you're deploying to Heroku instead of managing your own Linux servers, check out our Express security checklist and consider adding Expedited WAF for additional protection against DDoS attacks and other OWASP vulnerabilities.