Never see localhost HTTPS warnings again
Setting up working localhost on your Mac takes 5 minutes.
July 12, 2021
If you've done any web development you'll be used to seeing this every time you connect to https://localhost:
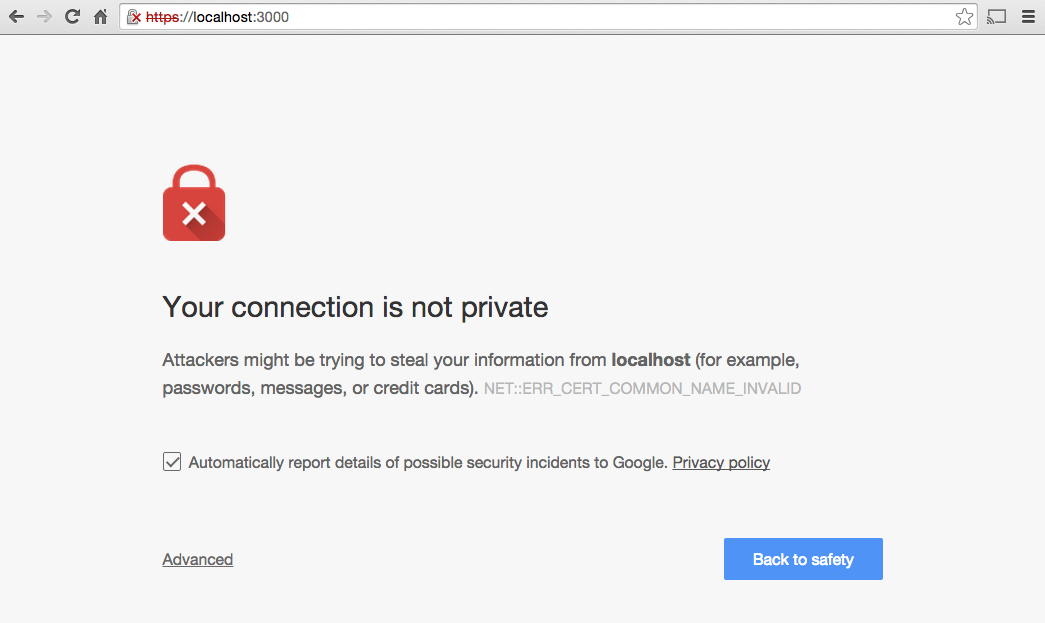
Unless your OS has already been hacked - at which point it's already too late, since the attacker could have already installed anything they wanted - localhost is likely to still be yourself and not an attacker as the message suggests.
If you're tired of seeing the warning, and the two clicks required to show localhost over HTTPS, you can make your machine trust itself. It takes less fivr minutes, there's no software needed, there's only one command, and you'll never see localhost SSL warnings again.
Step 1. Create a self-signed root certificate
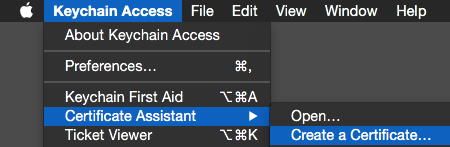
Start 'Applications' > 'Utilities' > 'Keychain Access'
Inside KeyChain access, in the menu bar, click 'Keychain Access' > 'Certificate Assistant' > 'Create a Certificate'
On the 'Create a Certificate' screen:
- Change 'Name' to 'localhost'
- Leave 'Identity Type' as 'Self Signed Root'
- Change 'Certificate Type' to 'SSL Server'
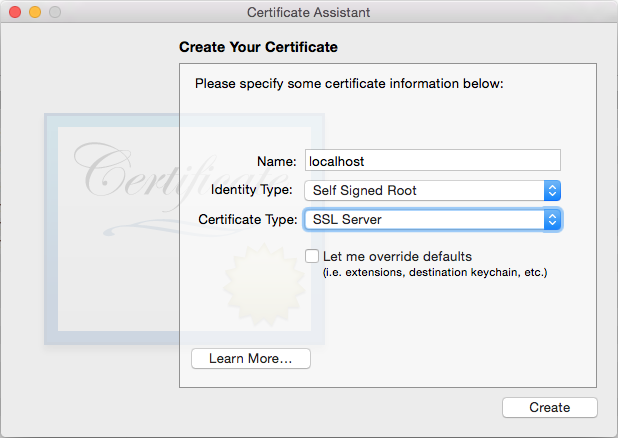
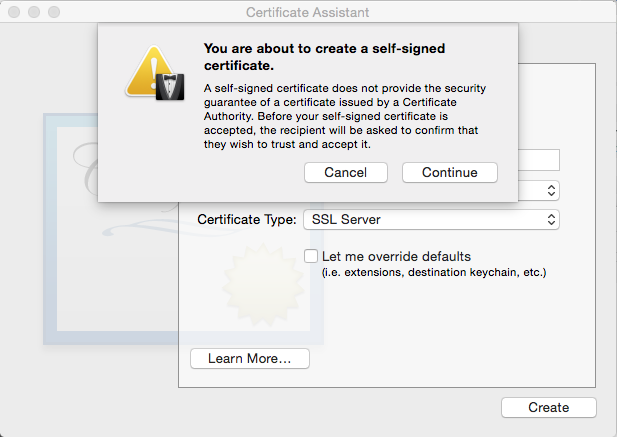
Then hit 'Create'. OS X will tell you that a self signed certificate doesn't provide the security guarantee of a certificate assigned by a CA, which is true: encryption has very little value without identity.. However your self signed certificate is only for your local machine, and not for anyone else to trust.
Hit 'Continue' to indicate you understand.
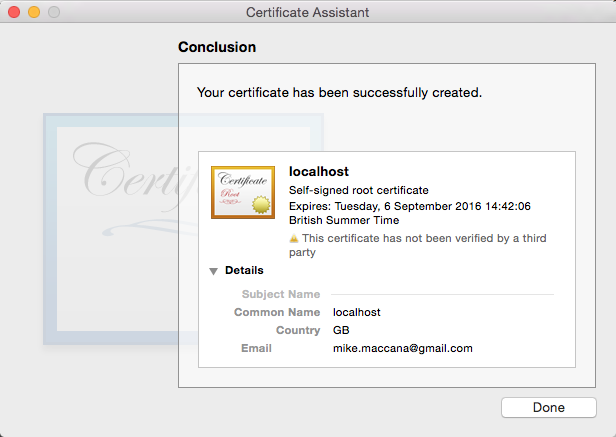
The new certificate will be shown. Click 'Done'
Step 2. Trust the new root certificate
You'll be back in Keychain's list of certificates. Click the certificate you just made - it will have a gold certificate icon beside it. Search for 'localhost' if you can't see it.

Expand 'Trust'. Change 'Secure Sockets Layer (SSL)' to 'Always Trust'
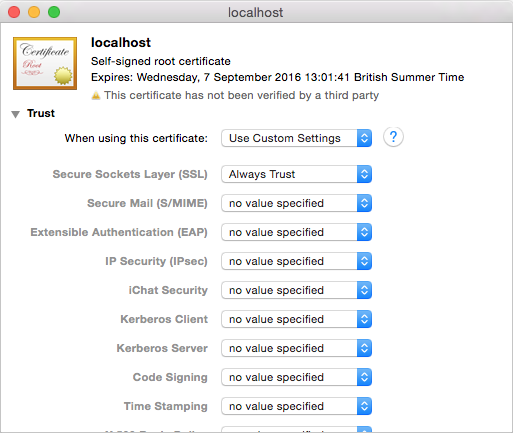
Enter your password when asked to make the change.
Step 3. Use the key in your apps
Now you'll need to set up the private key and certificate for use in your development web server. Most openssl apps (like nginx, node, etc) typically use pem format keys, so we're going to export the key and change the key format into .pem.
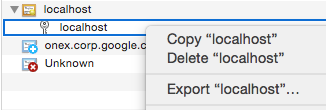
Back in the list of certificates, find the private key for localhost (it will have a key icon next to it).
Right click the private key and export it. Select a folder, and change file format to be 'Personal Information Exchange (.p12)'. Hit 'Save'. You'll be asked to create a password to encrypt the file: you can enter one or you can just hit OK to skip. Then you'll be asked for your own password again to allow the extraction.
Now let's change it into a PEM file. Open Terminal, then run:
openssl pkcs12 -in Certificates.p12 -out Certificates.pem -nodes
You'll be asked what the password is, just press enter since you didn't set the password:
Enter Import Password:
MAC verified OK
This creates Certificates.pem, a single file with both the private key and the certificate inside.
Since most web servers prefer seperate files, you can separate Certificates.pem file into separate files. I like to make a ~/.localhost-ssl directory to put the files into, so everyone working on a project can use their own keys. Eg, put:
-----BEGIN CERTIFICATE-----
certificateGoesHere
-----END CERTIFICATE-----
into ~/.localhost-ssl/cert.pem.
Then put:
-----BEGIN RSA PRIVATE KEY-----
privateKeyGoesHere
-----END RSA PRIVATE KEY-----
into ~/.localhost-ssl/key.pem.
Now make your web server use cert.pem for the certificate and key.pem for the private key and when running on localhost - this is up to your individual web server.
Et voila! No more localhost warnings!
Bonus: quick command line HTTPS server
Sometimes you need a quick command line web server to share out a folder for a quick proof of concept. You can use your key and cert files to make a trusted HTTPS server too.
Install node if you haven't already, and grab the http-server module:
sudo npm install -g http-server
You can then then start and HTTPS server with:
http-server --ssl --cert /path/to/cert.pem --key /path/to/key.pem
This will share out your currently directory on https://localhost:8080
Since that's an awful lot of typing, add this to your .bash_profile
function https-server () {
    http-server --ssl --cert ~/.localhost-ssl/localhost-ssl/cert.pem --key ~/.localhost-ssl/key.pem
}
You can then simply type https-server to share out the current directory over HTTPS.